
Introduction:
They say that it is better to give than receive and during this holiday season, this happens to be true. In the past, when the the holiday season approached, I was always one to carelessly purchase some generic plastic gift, for my family, that would eventually find its way into the garbage. Although it can be said that 'it is the thought that counts', I have always felt as if the thought was never enough. This year was going to be different. After enlisting the help of my brother and using our combined knowledge of woodworking, we secretly ventured out to our shop to create projects that would serve as useful and substantial gifts for our mother and father. In this article, you will follow along with the process of how we successfully pulled off this holiday mission, throughout the entirety of December. This is our Christmas Story.
Day 1 - 1 Idea
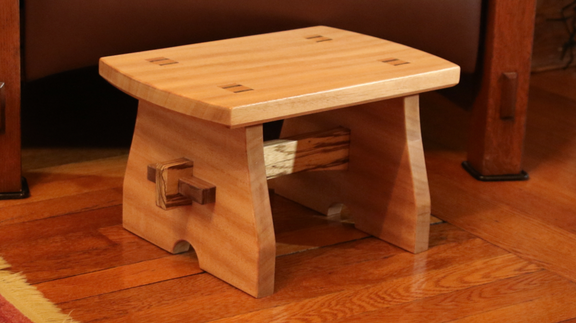
The day was December 15th, and after many pensive days we finally decided the perfect gift for our mother! Over the years, she has collected a variety of craftsman furniture in her room, but has always used a cheap, plastic step stool that looks extremely out of place within the surrounding furnishings. Therefore, we decided to construct a mission style step stool, with a variety of wood species and Japanese joinery, to match the rustic and organic atmosphere of her room. Our father, however, rarely expresses interest in tangible gifts, so we were still unaware of what his project was to be. This was expected.
Day 2 - Planning Day
As always, we plan out our work before physically constructing any project. The commencement of our planning process begins with modeling the design in Solidworks; a 3D Modeling Software. Using this application, we composed the stool to have an appropriate design, size, and character, that would comfortably fit into the ambience of the house.
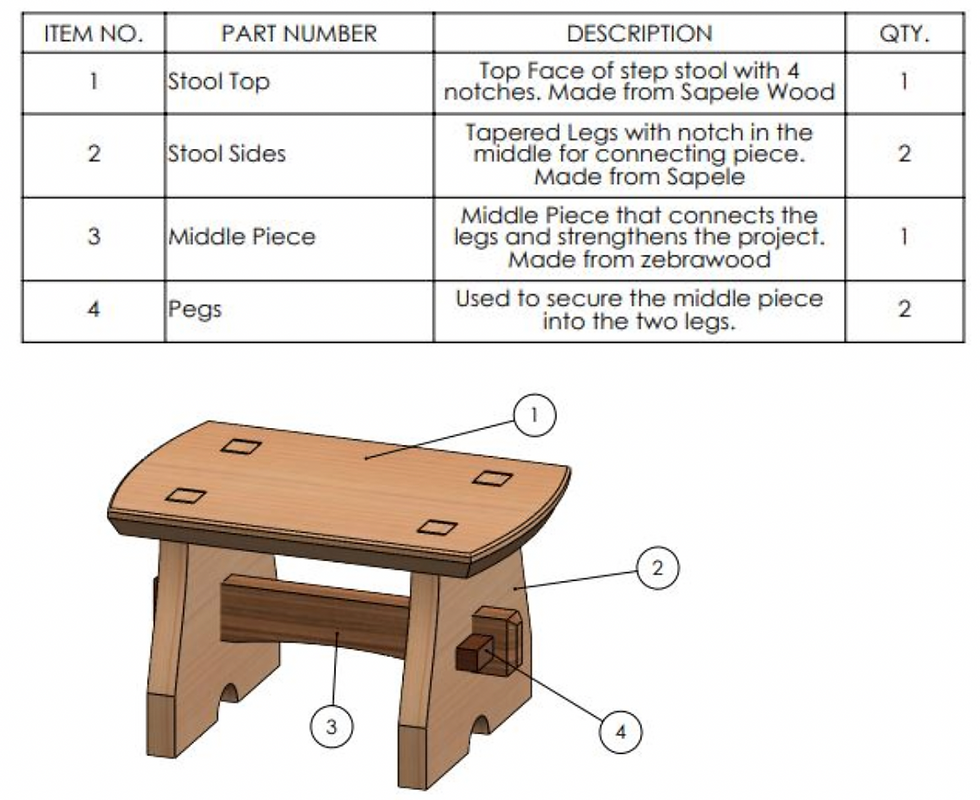
Proper wood species was also decided at this stage. The top and side faces were to be made from sapele, an African hardwood, due to its persistence and familiar workability. The connecting middle piece was to be made from zebrawood, another African hardwood, due to its contrasting light and dark features. Lastly, the wedges and pegs, were to be made from English walnut, to properly compliment the conflicting color
scheme of the entire project.
Since this project had a noticeable amount of irregular curves and shapes, I wanted to try making this gift using templates. Template woodworking involves creating thin, 2D structures, that serve as reliable guides when cutting out final parts. Templates are attached to the usable lumber and cut just outside the perimeter lines with a band saw. Using a flush cut bit on a router table cleans up any imperfections left from the saw and leaves the maker with an ideal result.

Within Solidworks, the user is able create a file, that is compatible with a Laser Cutter, and print out precise, reusable templates of their choosing. For this project, I used my laser cutter to cut out templates, from a 1/8'' acrylic sheet, for the top face, side faces, and connecting middle piece.
With everything suitably planned and cut out, we were undoubtedly ready for construction.
Day 3 - Construction Day
The day was December 17th and it was finally time to use some power tools. With our workpiece of sapele set aside the day before, we were able to quickly attach our templates onto the work surface, with double sided tape. Using our band saw, my brother and I, as well as my father, cut out the top, side, and middle faces, in order to extract our desired shape from the wood. At this point in the process, we transferred our workpieces over to the router table so we may create smooth edges and a crisp perimeter.

In order to cut out the rectangular holes within the top, side and middle pieces, we used our coping saw and chisels to create an incision where the band saw could not reach. These holes, also known as mortises, create points of entry for a tenon, in order to form a strong joint and appealing visual.
The only parts that were left to cut out were the wedges and keys. Both were quickly made from English walnut and fit perfectly into the pre-cut recesses.
Since I was doing wedged mortise and tenon joinery on the top, the mortises on the top face needed to be chiseled at an angle, in order to give the wedges room to expand when under pressure. Doing so increases strength and decreases the risk of snapping.
With all parts cut out, it was time for the glue up.
Day 4 - Assembly
On December 18th, it was time for the most exhilarating part of the build: the glue up. In my past blog, I discussed how intimidating this process can be. With so many uncontrollable factors that need to be controlled, this step can easily make or break your project.
As with any project, we always dry-fit our pieces together, in order to observe any last minute mistakes or imperfections. Due to the precision of the template, our pieces comfortably fit together and we were ready for glue.
When gluing up, there are a number of conditions that must be met before any glue is applied.
First, I am sure to place tape on all areas where glue squeeze-out is common
Second, I have an exact order to connect everything so that the process will go together smoothly
Lastly, I have a damp rag near me to clean up any unnecessary squeeze-out.
Using these conditions as a guide, I firmly clamped everything together, with the exception of the wedges. Once the body was fully dried, I hammered in the wedges separately and cut
any protruding joinery flush to the top after about 8 hours.
Day 5 - Finishing One Project and Starting Another
With the stool free from the clamps, it was time to begin the finishing process. As always, we started sanding the entire project at 80 grit and moved upwards toward 220 grit. Sanding is frequently regarded as a very time consuming process, therefore, this stage in the project took about 2 hours.
Once the sanding process was complete, all of the dust and dirt was wiped with mineral spirits, to create a sterile base for the finish to rest. Using a wipe-on, oil-based polyurethane, we were finally able to view the rich, natural luster of the intricate wood grain. Three coats of finish were evenly applied to the stool, creating an exponential increase in sheen and refinement.
Once dry, all that was left to do was take some photos and wrap the gift!
Some final shots of the finished product are below:


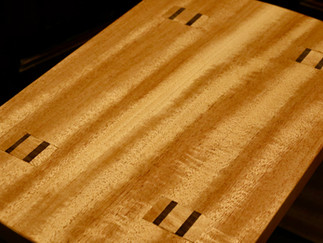
With the stool finally finished and waiting to be unwrapped on Christmas morning, we were only halfway done with this holiday mission.
Luckily, while building the stool, we thought of gift that our father would love and use for years to come: custom-made handles for his gardening tools.
My dad has always loved to garden and although some of his results have not been the greatest over the years, we believe that this gift will provide him with his long sought-after green thumb.
With this project idea in mind, we ordered a kit of gardening tools, and were ready to build...again.
Day 6 - Construction...again
On December 20th, the kit arrived and we planned the appropriate size and material of the handle before cutting anything.

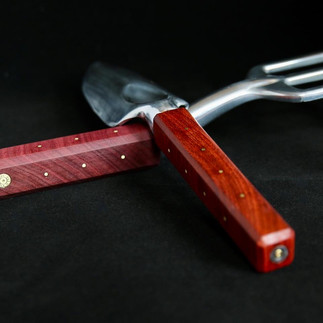
My brother was going to make a shovel, with a handle of red padauk wood, while I was to make the rake, with a handle of purple heart wood. Both were going to be fitted with brass down the spine and specially inlayed with real bullets; a design inspired from our previous hammer projects.

Using the table saw, we cut out 6'' wooden blanks and used our drill press to create an 11/16'' recess for the tools to rest.
In order to create a comfortable feel on the handle, we used our router table to create a chamfer on each of the sides.
After some light sanding and accurate calculations, we marked out our own locations for the brass and bullets to reside. Using our drill press, we drilled in holes and placed our brass in their respective locations.
With the handle properly embellished, all that was left to do was to attach the tool head. As always, we taped up any areas where squeeze out was likely and poured fast setting epoxy into the recess, followed by the shovel and rake.
This project was nearly complete!
Day 7 - Final Finishing and Wrapping
On the afternoon of December 21st, the epoxy was fully cured and ready to be completed. Since this project was going to be handled regularly, we started sanding at 80 Grit and worked our way up to 320 Grit. Any imperfections were sanded away, until the handle was as smooth as glass.
To finish this project we applied the same wipe-on, polyurethane that we had used on the stool. Due to the unique natural appearance of the wood, each of the handles exploded with a distinct color and vibrance. Four coats of finish were evenly applied to the handles, creating an amazing sense of elegance and luxury.
Before: After:

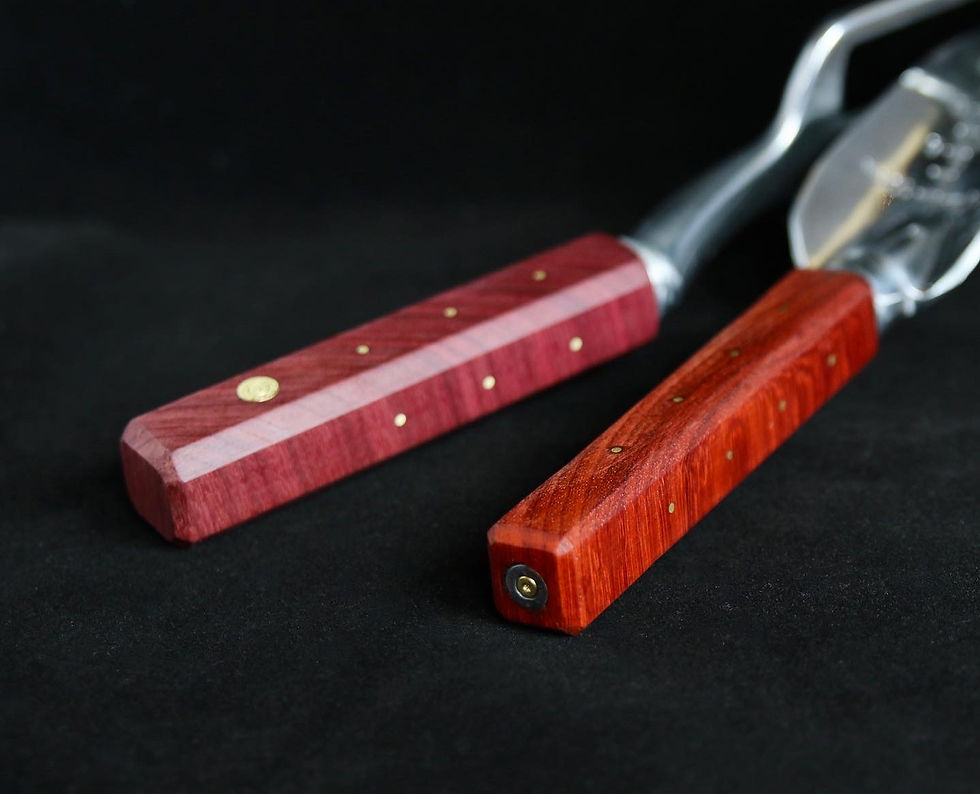
Some final shots of the finished product are below:


With everything finished and wrapped, our holiday mission was finally complete!
Christmas Morning
Once again, they say it is better to give than receive, and this year I can understand why. There was no better feeling in the world than handing our parents their own handmade gifts and seeing their priceless reactions. Both were confused at first, but that confusion quickly turned to excitement at the sight of a custom build.
Somehow my brother and I were able to secretly pull off this holiday task and provide beautiful projects that will serve as amazing family heirlooms for generations to come!


Thank you to all who have read about our Christmas Story. Have a Happy Holiday Season and a Wonderful New Year! See you all on the next blog!
Do your thing man. Go to town man. Go to town!