The Symphony
- John Protano
- Dec 22, 2022
- 7 min read
Introduction:
Today's modern age, provides the public with boundless modes of technology and convenience. With the emergence of applications, such as Instagram, a user has the capability to post photos, message others and record videos all on one platform. With Apple Music, users can listen and download millions of songs with one click of a button. This evolution in technology has become too complicated, forcing us to be reliant on our current devices and overlook the devices of the past. One such appliance: The Record Player.
For years this invention has been regarded as an amazing tool for providing soothing music, with a unique pitch and nostalgic feel. My family are proud owners of a record player and although we absolutely adore the music, the actual turntable was too nomadic; changing locations in our house, as often as the songs. After years of one makeshift location to another, I felt it necessary to create the perfect vessel for my record player to reside. A project to compliment the antiquity of the past, as well as, serving purpose and utility. But what should the name of this project be? The only appropriate name: The Symphony.
My Process:

Step 1: Planning. Each project starts with the appropriate game plan in mind. The importance of properly planning and visualizing your work is a skill that is must not be overlooked. In the image to the right, I was able to directly shape my ideas into digital form using Solidworks; a 3D modeling software. This program assists me to create plans with precise dimensions and clear visuals, so they can be referenced throughout the physical construction process. At the start of my woodworking journey I was always one to
blindly construct a project with a vague idea in my head. However, as I worked toward my finished product, I would eventually pay for my laziness in materials and time.
Step 2: Materials. Lumber is very expensive, so it is advantageous to know what type, and how much you need before a purchase. As a craftsman's experience grows in this field, they come to realize how important the species of wood is for each build. Each type of wood has distinguishable characteristics, beyond the physical, such as expediency and durability. These must be considered.
For my record table base and table top, I chose Sapele, an African hardwood; due to its persistence, rich luster, and straightforward workability. However, for the various inlays of the project, I decided to use contrasting wood species to add more of an aesthetic depth to the finished product.

After executing a concrete game plan, I head to Singh Hardwoods, in Queens, New York, to grab the appropriate quantity of material. I go to Singh Hardwoods exclusively, for the effortless buying process, great customer service and vast selection. I highly recommend if you are in the area.
With my project planned out and my lumber selected I was finally ready to begin Step 3.
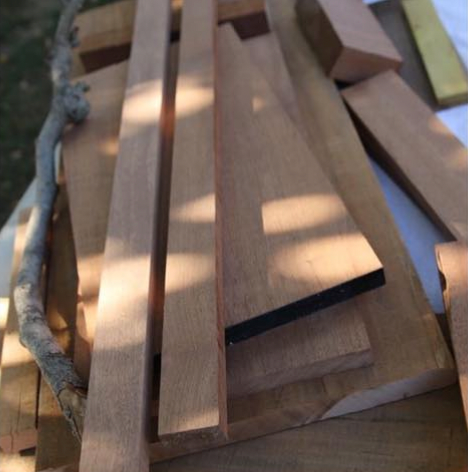
Step 3: Construction. Now was the time to turn on some loud power tools. With all of my lumber rough cut from the lumber yard, I run everything through the jointer and planar to square my boards to yield accurate surfaces for measuring and marking. This is a crucial step in the building process. I am sure to do this with everything, including the scrap wood that I will be using for the inlays.
Side Note: In the photo above, you may notice a branch mixed in with the squared boards of sapele. This branch is from a tree that my brother and I regularly climb. Through the years we gathered some of the dead branches, with plans of using the wood as inlays for future builds. Using our band saw, jointer and planar, our branch was suddenly transformed from a branch into precise, workable lumber. In doing so, our tree was to be in our family forever...a true giving tree.
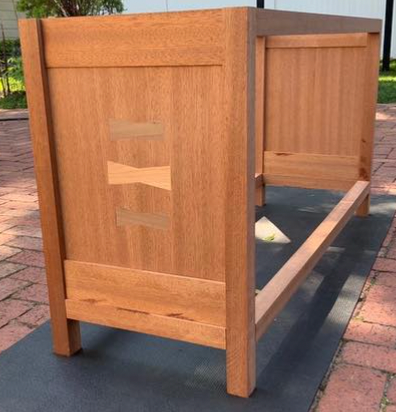
While referencing my plans, all the milled wood was cut to proper length. The legs were cut first, followed by the body, side panels, middle divider, and top. Once cut out, we began preparations for our bow tie inlays. An intimidating, but well-prepared-for process.
My plan was to have 3 bow ties on each side; 2 small ones made from walnut and one large one from cherry. I grabbed my marking knife, precisely marked out the locations of each inlay, routed out any waste, chiseled way the excess, and hammered the inlay in with authority. At first each bow tie took about 30 minutes to complete, but as I progressed, I felt more comfortable with my cuts and was able to finish each in 20 minutes. Being patient and confident in your work is a skill that must be regularly practiced in this field. In a couple of hours, the inlays were finally complete, with very minor errors and major results.
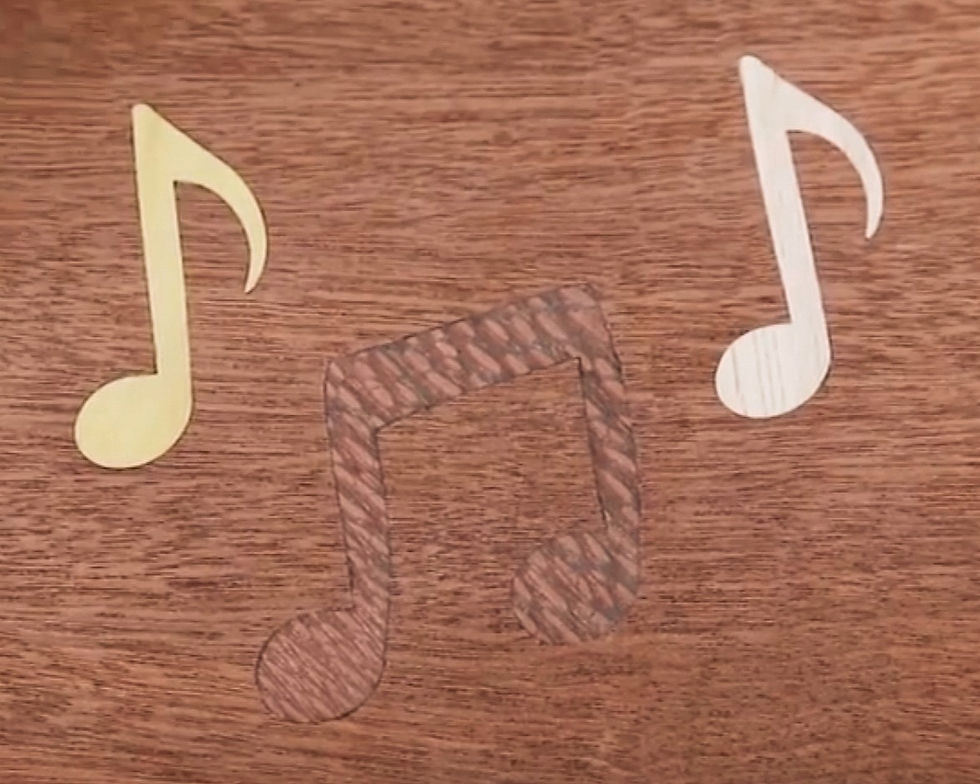
However, I wasn't finished. To add a bit more exclusivity, I wanted to add 6 music note inlays on the top face. I have never seen this process be completed by hand, but using my bow tie inlay experience as a prerequisite, there was nothing to it but to do it.

I created my music notes on Solidworks and used my laser cutter to cut out distinguishable figures. Each note was composed of a contrasting wood species; such as cherry, leopard wood, yellow heart, walnut, ash, and birch, to add a creative flare to the end result.
With my inlays cut out, I traced my desired location on the top and carefully routed out any waste. Due to the extremely narrow regions of the music notes, I had to be especially careful not to not pass my marks. One mistake can cost me the clean and refined look I intended so once again patience must be expended. Luckily, my anxieties remained distant and the result was similar to the accuracy of a CNC machine.

Since this was a highly in-depth and attentive process, each inlay took me about 45 minutes, but was well worth the effort in the end!
With all of my parts cut out and properly embellished, I was ready to begin for assembly.
Assembly:
The assembly is a crucial step in the advancement of a final project result. For many builders, the assembly is notoriously regarded as one of the most nerve-racking stages of the entire project. But why? When glue is placed, the maker has a limited window of workability before the glue hardens and creates uneven and irregular points of contact. Finish/lacquer will not soak into any surface where glue has dried, therefore, the builder must be attentive that no glue makes its way outside the bounds of a joint. Additionally, one must also consider the temperature. If too hot or cold, the glue will become weak and gain a abnormally white appearance, creating an eyesore to the final result. With so much to keep track of, it is no wonder that many fall victim, myself included, to the much dreaded and highly intimidating glue-up.
However, all of these apprehensions can be averted if properly planned for.

I am sure to dry-fit all of my parts together without glue to double check if there are any mistakes. It is always better to discover a mistake in a stress-free environment as opposed to a situation where every second counts.
Fortunately, I had no errors so I was able to grab all of my clamps and head right to the final assembly. Some tips that I have learned to follow for a successful assembly are:
When gluing up a project, I am sure to place tape on all areas where glue squeeze-out is common
I am sure to have an exact order to place everything so that the process will go together smoothly
When working on a large project such as this, I ask other people to help me align everything
Use a damp rag to clean up any unnecessary squeeze-out.
With everything firmly clamped together all that was left to do was wait.
Finishing:
After 24 hours, everything was firmly in place. I took off all the clamps and tape and cleaned everything up with a chisel and sandpaper.
I brought everything outside and started sanding at 80 grit and moved upwards toward 220 grit. As always, sanding is a very time consuming process, therefore, this stage in the project took about 3 hours.
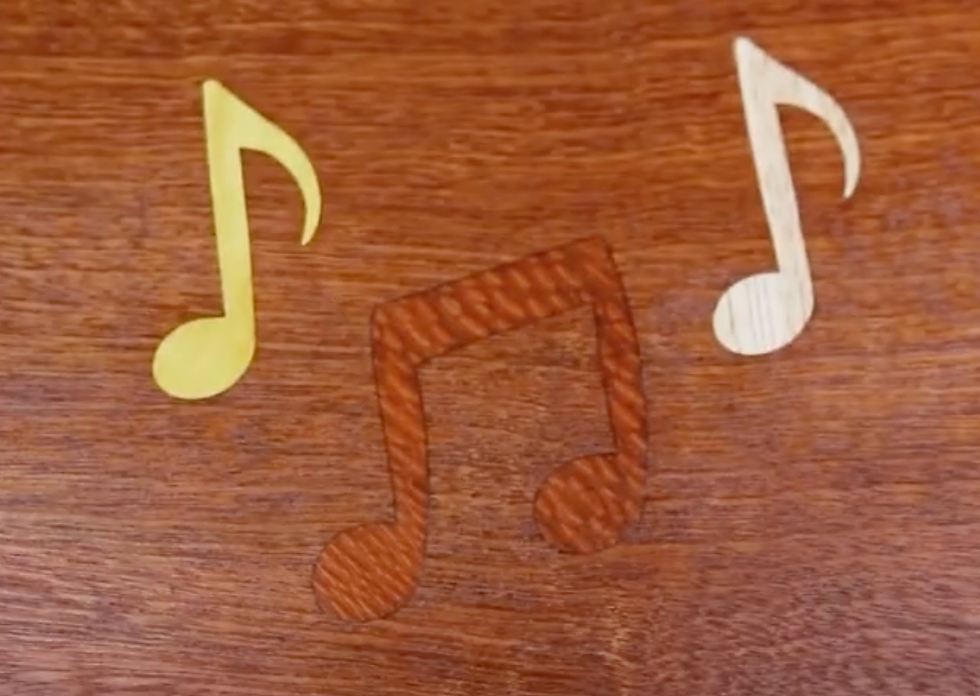
Once sanded, I wiped off all of the dust with mineral spirits and began to apply my finish. Using a wipe-on polyurethane, we were finally able to get a satisfying glimpse of the beautiful wood grain that has been lurking below all the dust and dirt. Three evenly spread out coats of finish were applied; each more exquisite than the last.
Before: After:


Once dry, the top was positioned and assembled using Z-clip table top fasteners. This was the first time seeing everything come together with finish on, so it only appropriate to take a well deserved step back and just appreciate the beauty of the project in the sun.
Final Placement:
Now was the time to give the family record player a perpetual living space. The time for a nomadic lifestyle was over!
We evenly positioned the turntable in the middle of the table top and strategically placed our two speakers on either side, careful not to cover any of the music note inlay. All of our records were loaded into the storage units below and we began to listen to our first record: Ben Webster Meets Oscar Peterson; a jazz record.
There is no better feeling in the morning than sitting down with a hot cup of coffee and simply listening and appreciating the melodies of the past. Just to be able to physically touch and smell the vinyl creates such a pleasant and calming atmosphere that a user on Apple Music would never experience.
This piece has been such a pleasure to work on. I have truly learned a lot as a woodworker, creator and now blogger, I hope that you have enjoyed reading about my experience as much as I have enjoyed writing about it. Thank you for stopping by my first blog and I hope to see you on the next one!


Welcome to the Goody Room!!!